Showing posts with label Hairstyle. Show all posts

Tuesday, September 27, 2011

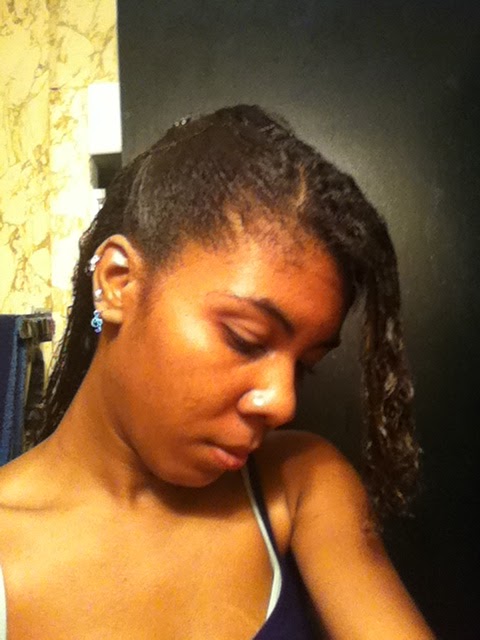
Formal Half Up Long Curly Hairstyle

I found another one of those hairstyles WITHOUT INSTRUCTIONS. I think it looks interesting, so I'm willing to give it a try.
Ok, so I had to study the picture a little bit. It looks like a section of hair is pinned at the crown all bumpit style, and a section from each side near the face is pinned next to the creepy bumpit thing.
First, I parted the hair in half from ear to ear and pinned the back half to keep it out of the way.

Then I separated the side and front sections and clipped them.
In the picture, it looks like the roots are "teased". Well, I don't do that. I just twisted the hair and pushed it forward a little. My hair is poofy enough by itself. No teasing necessary. It took at least ten pins before I felt like the hair wouldn't fall down.
I brushed back each side section and attempted to pin them in place. The pins didn't work, so I used a little clip for each side.
Then I let the bangs out and released the back section from the clip. I really liked the way it looked, in spite of the time and all the pins. I should have set a timer so I would know exactly how long it took. The web site says to allow at least two hours for hot rollers and teasing and spraying and pinning and whatnot. Yeah, I'm not doing all that. I don't think I spent more than 15 minutes, and that was only because I was figuring out how to do it.

Wednesday, September 14, 2011

Mila Kunis: Low Undone Bun

This is actually the second time I've done this style, but I forgot to take pictures the first time. This is another one of my journeys into the land of hairpins. They really are amazing.
1st step: ponytail. I found that the short hairs in the front can actually reach a ponytail if it's high enough. However, this ponytail is low, and I hate the brushed-straight-back look, so I'm gonna pin it to the side.
Take small pieces of hair, twist them, and pin the ends into the base of the ponytail. I don't even know how many pieces I used. Maybe ten?
Oh hey, red streak! That's not dye. That's just too much time in the sun. Natural highlights and whatnot.
Mmm cinnamon roll hair. I didn't make it messy like the directions say. There's no point in trying that unless my hair is straightened and dry. That's probably why it looks drastically different from the Mila Kunis picture, but I like the way it turned out. With all the pieces of hair twisted around, it looks a lot more complicated than it is, and it feels really cool. I like to keep touching it all day long.

Sunday, September 11, 2011

"A Cool Hair Idea That Just Requires a Few Hairpins"

This is the hairstyle I wore (or tried to wear) for the bosses' Labor Day barbecue. I wanted to have most of my hair down but off my face. First I had to buy hairpins because there wasn't a single one in the entire house. I now know the difference between hairpins and bobby pins. The hairstyle page includes a link to a video showing how to use hairpins. That was definitely a life saver because I've never done it before.
First I separated out the middle section to make a little bump. Not to high, though. I'm not one of THOSE girls with the 3-inch high bump. That's just crazy.
Part two sections on each side of the bump and twist them. At the end of each twist, insert the pins toward the face. I used two pins for each twist and at least four for the bump.
It felt really secure. I'll probably do a thinner middle section next time. I might straighten my hair first, too. That's one of the few good things about winter: my hair stays straight for days.
I wish I could include a picture of the awesome polka-dotted minidress I'm wearing, but I haven't figured out how to take full-length pictures of myself. I'm definitely not asking my mom to do it.

Easy Messy Up-do

I love updos because having my hair on my neck when it's hot is really annoying. I'm also starting to love anything with a twist. This style is like the half-up half-down except the down part is twisted. Cool.
Ok, put the front half of my hair in a ponytail. That part was easy enough. (Freshly washed hair with Motions hair lotion)
Twist the back half upwards and secure with pins. I added the end of the twist to the front ponytail.
I didn't curl the ponytail because I'm way too lazy for that, and I didn't leave any bangs out in the front because my bangs don't work in the summer. Soon....

I'm not sure how I feel about this style. I bet it would look better if I straightened my hair first. I'll probably try it again in about a month. The back twist kept sagging, probably because my hair was wet, and that was pretty annoying. Maybe more pins next time? We shall see.

Saturday, August 27, 2011

Simple Side Braid

In my search for hairstyle ideas, I've found lots of sites telling me that braids are very popular right now. I used to wear my hair in cornrows all the time, so braids are not a new concept for me. I found this easy style on the Tresemme web site. I've worn a style similar to this one, but I've always made a skinnier braid. I thought trying a wider braid could be interesting. This style is great for me and my headaches because I could have most of my hair loose and still keep it off my face.
I didn't watch the video; I just read the three steps. It's pretty easy to figure this one out from the picture. I also didn't use the Tresemme mousse. Instead, I washed my hair and massaged in the Motions hair lotion from root to end, of course paying special attention to the ends.
First I had to separate out the hair for the braid and secure the rest of my hair.
Then I did the actual braid, twisting the strands toward the outside instead of inside. I just think the inside braids look a little funny as cornrows. I used a clip to hold the braid behind my ear instead of braiding all the way to the end. And that's it. Very simple style and finished very quickly. This one is definitely a keeper.

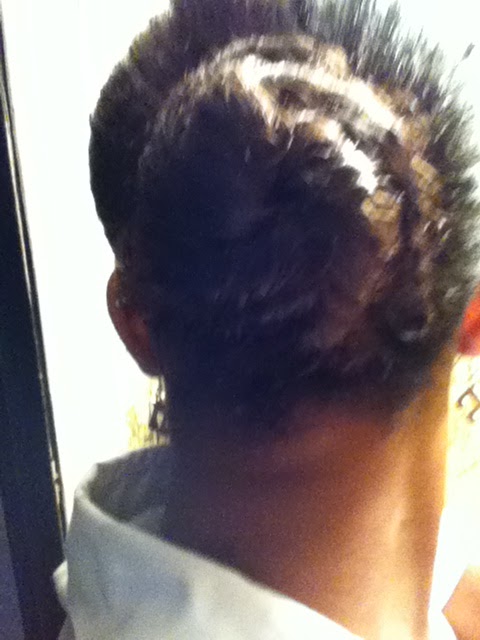
Pretty Twisted Bun

This is another hairstyle from Seventeen. I like wearing my hair in a bun because it's secure and off my face and neck, but I think brushing my hair straight back is really boring. This bun gives a boring style a little twist, literally.
I didn't wash my hair this morning, so I started with dry hair. That's actually good because the bun will be a little bigger than it would be with wet hair. I sprayed all over with leave-in conditioner to dampen the hair a little and make it easier to work with and also to make the edges lay down.
Deep part. Check. I made another part a couple inches below the first one to create a rectangular section of hair.
I tightly twisted the top section of hair. While holding the twist, I gathered the rest of my hair into a ponytail behind my ear and added the twist on top.
I divided the ponytail hair into 2 sections and twisted one section around the first to make a bun. Then I twisted the second section around the first bun. I think it looks like a Cinnabon. It's kinda making me hungry. By the way, taking a picture of the back of your head is really difficult.
I really like the finished product. Normally, I don't do side ponytails or buns, but the cuteness of this one really surprised me. I might do it more to side next time just to see how that looks. Also, this only took a few minutes. I'm not one of those people who wakes up extra early for hair and makeup. I like my sleep.

Monday, August 22, 2011

Triple Ponytail

Today I wanted to try a new hairstyle. I searched for hairstyles online, and I just kept getting pictures of girls with their hair parted and brushed down. Ok, that's not a hairstyle. It's a haircut. And that doesn't help me. Most updos are meant for prom or weddings, but I don't usually go anywhere except work and stores near my house. I don't need fancy hair for that. I just need it to be off my face and neck so I don't get hot. Oddly enough, the web site I found most helpful is Seventeen magazine. It's been awhile since I was a teenager, but I decided to give them a chance anyway. I looked through all of the hairstyles for medium-length hair and curly hair and eventually settled on this one under Updo Hairstyles. Obviously, my hair is different from the model's hair, so I can't expect the style to come out the same way on me.
Last night after I washed my hair and greased my scalp, I braided each of the four sections. When I unbraided them this morning, I was left with a nice crimping effect.
Since I have this bangs situation, I usually need to separate a triangular-esque portion from the front my my hair to be pinned back later.
Before I made the three ponytails, I sprayed the hair close to my scalp with Aussie Hair Insurance. This stuff smells great, and my hair is easier to work with when it's wet. The spray also hardens a little bit when it dries, so all the strands of hair are held in place. After I made the ponytails, I generously sprayed the hanging hair. Since my hair curls more when it's wet, I thought this would give the curls a little boost and also help keep them nice throughout the day.
The finished product kind of looks just like the next to last step. I wasn't exactly sure on how pinning the ends of the ponytails was supposed to work, so it came out a little wonky-looking. I actually prefer the look of the penultimate step since it gives the illusion of one long ponytail. I really enjoyed this style, and I'll definitely be adding it to my regular rotation.